Tessa Rhodes

I help children overcome their fear of water with a dose of compassion and a whole lot of patience.

  • HOME
  • ABOUT ME
  • THE BUSINESS SIDE
    • Online Professional Development Classes: Empower Your Team
    • Small Business Ideas for Teachers – Start A Private Swim School
    • Best Class Management Software 2024
    • How Many Followers for Amazon Influencer Program: Essential Key Points
  • COURSES
    • Free Course: How to Prepare Your Baby for Swim Lessons 0 to 8 Months
    • Online Swim Academy
  • FREE RESOURCES
  • MY BLOG
    • How to Start a Swim School
      • Small Business Ideas for Teachers – How To Start A Private Swim School Business Without Any Experience
    • Overcome fear of water
      • Fear of Water? Help Your Child Learn to put Their Face in the Water
      • Toys for Swimming Lessons: The Benefits
      • Games to Motivate Your Child to put Their Face in the Water
      • Help Your Child Learn How to Front Float
      • Help Your Child Learn How to Back Float
      • Having Fun Learning Various Rolls, Floats and More
      • How to Give up the Nose Clip, Goggles and Ear Protection
      • Teach Your Child to Propel through the Water
      • Breath Control: How to Blow Bubbles for Beginner Swimmers
      • Help Your Child Overcome Their Fear of Deep Water
      • Functional Needs Swimming: Tips for Safe & Enjoyable Learning
    • Swim Product Recommendations
      • Period Swimwear: Revolutionizing the Way We Swim on Our Cycle
      • Best Swim Caps for Keeping Hair Dry: Top Picks for 2024
      • Best Swimming Goggles with Nose Cover: Top Picks for You
      • Best Swim Goggles for Women: Top Picks for Comfort & Clarity
      • Best Swimming Goggles for Glasses: Top Options for 2024
      • Best Swim Goggles for Men: Top Picks and Ultimate Guide 2024
      • Best Swim Goggles for Beginners: Top Picks and Guide 2023
      • Best Swim Goggles 2023: Top Picks & Expert Guide
      • 4 Must-Haves for Your Vacation Getaway
      • Best Swim Fins for Kids
      • Finis Floating Island: Not Just for Kicking Practice
      • Finis Tempo Trainer: Not Just for Competitive Swimmers
      • Swim Mirror: Best Teaching Tool for Swimmers of All Levels
      • Treasure Chest: Proven to Motivate Even the Most Fearful Young Swimmers
    • Water Safety Topics
      • Your Family’s Guide to Swimming Pool Safety: Top Resources and Tips
      • Teach Your Child to Respect the Water
      • Water Safety Quiz
      • Do Swim Diapers Hold Urine?
      • International Water Safety Day May 15
      • Do Life Jackets Prevent Drowning?
      • Don’t Become a Drowning Statistic – Fence It In! Part 2
      • Don’t Become a Drowning Statistic – Fence It In!
      • How Do You Prevent Drowning?
      • What Is the Least Amount of Water It Takes to Drown?
      • How Do You Know If Someone Is Drowning?
      • What Does It Mean to Be Water Safe?
      • There Ought to Be a Law
      • When Will My Child Ever Learn?
      • What Are the Statistics of Drowning?
      • Where Drowning Takes Place Changes with Age
      • Having a Pool Party? Consider Hiring a Lifeguard
      • Don’t Take Offense but You Need a Fence
      • Are Water Wings Safe?
      • Are You Comfortable around Water?
      • Any Source of Water Is a Potential Drowning Hazard
      • How Common Is Drowning?
      • My Story
    • Water Safety Newsletter
      • What Kind of Learner Is My Child Quiz
      • How to Prepare Your Baby for Swimming Lessons Part 3
      • How to Prepare Your Baby for Swimming Lessons Part 2
      • How to Prepare Your Baby for Swimming Lessons
      • How I Stopped Swimmer’s Ear Infections Once and for All
      • Tips and Tricks to Motivate the Scared Child to Float
      • How to Teach Assisted Floating
      • Respect for Deep Water
      • What Is Breath Control in Swimming?
      • Got a Child Afraid of Water on the Face? Watch This Video
      • Shallow Water Blackout: What Every Parent Should Know
      • Self-Rescue Challenge: 3-Year-Old Pulls It off Without a Hitch
      • Drowning: The Silent Killer
      • Thailand Cave Rescue Mission + How to Teach Nose Bubbles to a Young Child
      • Dry Drowning: Real or Fake?
      • Self-Rescue Swim: Amazing 2-Year-Old Crushes Self-Rescue Challenge
      • International Water Safety Day 2018
      • This Is How to Get Your Child to Put Their Face in the Water
      • 2 Clever Ways to Get a Swim Cap on a Child in Under 2 Seconds
      • Water Safety Tips for Adults: A Drowning and near Drowning Within 30 Minutes
      • Self-Rescue Challenge: 3-Year-Old Survives Test
      • Swimming Pool Safety Act for California: Updated Jan 1, 2018
      • Pool Gate Left Open: The Unspeakable Happened
      • Pet Doors: Are Any of Them Childproof?
      • Do You Have a Fearless Child?
      • All about Swim Diapers, in the News and Water Safety Tips
    • Frequently Asked Questions
      • How Long Does It Take to Learn to Swim: Understand The Timeline
      • Can Babies Swim Naturally?
      • How Do I Know If My Child Is Dry Drowning?
      • What Is the Best Age to Start Swimming Lessons?
      • How Do I Make My Child More Comfortable in Water?
      • Does Your Baby Suddenly Have a Fear of Water?
      • How I Stopped Swimmer’s Ear Infections Once and for All
  • SWIM SHOP
  • CONTACT

How Common Is Drowning?

October 31, 2016 by Tessa Rhodes Leave a Comment

Happy Halloween! How common is drowning?

I just loved Halloween when my son was still so young that I could dress him up in an adorable costume like a Dalmatian puppy (pictured below).

Then he got older, and the scarier his choices got. I miss the adorable costume days. so

I hope you have a happy and not to mention safe Halloween. So

How common is drowning?

Speaking of safe how common is drowning?

I would like to bring as much awareness as I can to the statics of drowning.

It is the number one cause of accidental death among children ages 1-4, and almost 4000 people die from drowning each year in America.

Luckily, this can be easily prevented. So

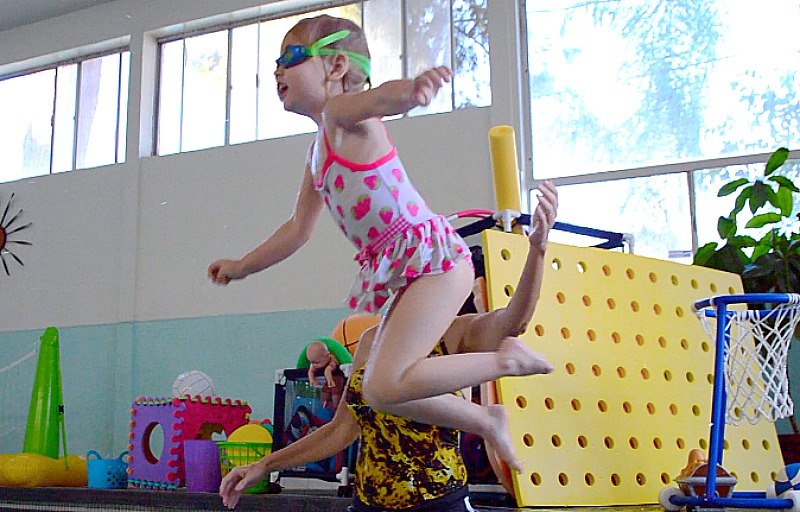
If you have a pool and young children, then it is critical to have multiple layers of protection in place to prevent accidents.

A climb-resistant mesh fence around your pool is imperative with a lock on the gate and alarms in place.

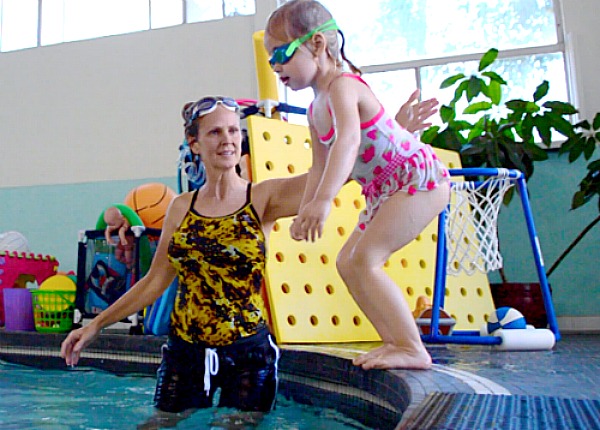
And of course, adult supervision at all times whenever your children are in, on or around water.

And finally life jackets. So

water safety newsletter

The more layers of protection, the better

Just the other day, the parents of one of my students told me that their daughter (my student 18 months old) fell in their pool.

The parents were right there to rescue her if she needed it.

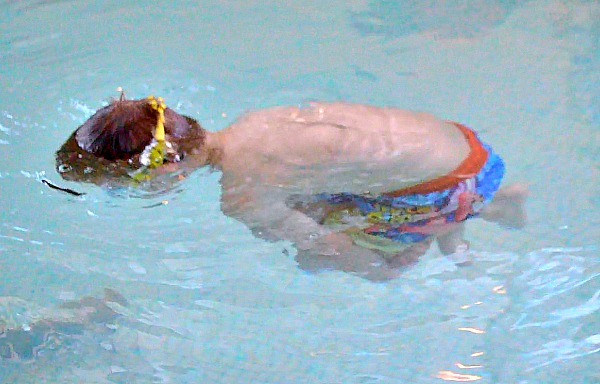
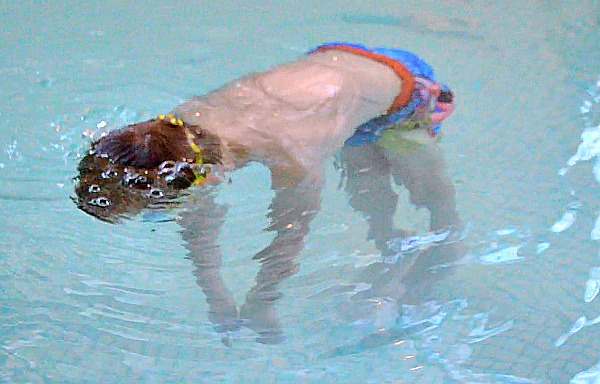
She handled herself very well, however. She knows how to hold her breath and turn back to the wall in instances like this. So

We’re all very proud of her. Way to go Symphony! Also

This incident just goes to show you that you can’t even turn your back for a second.

This kind of scenario happens way more often than you might think.

If you have any thoughts on the subject or experiences that you would like to share, I would love to hear from you.

Love the water,
Tessa how common is drowning?

P.S. Get the water safety app to help ensure your family stays safe in, on and around the water. It includes kid-friendly videos and quizzes. Search the iTunes app store for Swim by American Red Cross or click here. For Google Play you can use the same search parameters or click here. It provides the latest in water safety guidance to help ensure your family stays safe in, on and around the water.

P.P.S. To start your child on the path to becoming water safe, click here.

how common is drowning?
My son and my husband pictured on the right donning the same costume meant for a 3-year-old.

water safety newsletter

Teach Your Child to Propel through the Water

August 14, 2016 by Tessa Rhodes 2 Comments

how to teach your baby to swim 0-6 monthsBefore you teach your child to glide through water, make sure she can put her face in the water for at least ten seconds, front float for at least five seconds independently, back float for at least ten seconds unaided, roll and retrieve objects from the bottom, before teaching her to propel or glide through the water.

(This post contains affiliate links. This means if you click on an affiliate link and purchase the item, we will receive an affiliate commission at no extra cost to you. Full disclaimer.)

If she’s ready to propel through the water, you can start with floating face down in a streamlined position. Glide through water.

How to teach the front glide, streamlined position swimming, glide through the water.

Floating face down in a streamlined position

Glide through water.
Streamlined position float

To accomplish a streamlined position, have your child stand with her legs together and straight.

For the arms, I always tell my students to superglue their arms to their ears, then while reaching up to the sky, place one flat hand in front of the other flat hand.

Holding this position have her bend at the hips, hold her breath, put her face in the water and stretch her legs behind her, pointing her toes.

At this point, she should be floating in a straight line from her fingertips to the tip of her toes. Give her a gentle little push. Have her float like this for five or more seconds, then stand up. The goal is to maintain a streamlined position for ten seconds.

Perfect practice makes perfect

Some children can hold this position easily while others may lose their balance. Either scenario is correct. With practice, they will be able to maintain the correct position for the full ten seconds.

Have her try it again and, this time, experiment with the placement of the arms and legs.

Have her move her hands apart. It might be enough to stabilize her. If not, have her open her legs slightly or until she’s balanced. All the while making sure that her head is in a neutral position. By experimenting with the placement of arms and legs, the children are learning about buoyancy and their relationship with the water.

The more relaxed your child is, the easier it will be for her to balance while floating face down in a streamlined position. Once she has accomplished this for ten seconds, move on to the front glide. Glide through water.

Front glide through water

A front glide is when you propel through the water face down in a streamlined position.

Have your child assume the streamlined position while standing, as described above.

Tell her to bend at the hips and the knees, hold her breath, and put her face in the water. Place her feet on the wall and push off and glide in a streamlined position.

Some children won’t bend at the hips, and they’ll just fall into it. Then there are the kids who eventually get how to bend at the hips, but they won’t bend their knees, so they can’t push off with their feet.

It’s like jumping. Have your child stand on the bottom and then jump as high as she can. Now try from the wall.

Sometimes it’s easier to pick up your child and place her feet on the wall. Then tell her to put her face in and push off. Just like jumping off the bottom.

Now have your child place her arms behind her ears. She’ll need to tuck her chin to her chest to accomplish this. This is the actual standard arm placement for the streamlined position. It is essential that your child masters this skill. It lays the foundation for all swimming strokes.

If she can maintain the perfect streamline position for at least ten seconds, she will be ready to add the pull.

Do not underestimate the importance of floating in a streamline position. Have her practice every time she goes to the pool. Even if she has mastered it, it still needs to be part of every lesson. Even Olympic swimmers make this part of their daily swimming drills.

Time to add a pull. Glide through water.

10 best teaching tools for swimmers | Overcome fear of water


Front glide then one pull

The purpose of a front glide then one pull is to illustrate just how far you can go while exerting the least amount of energy.

Front glide. Streamline prone position.

Have your child do a front glide as described above and then when she feels her body slowing down add a pull and see how far it takes her.

The pull is accomplished by sweeping both of her arms all the way around to her thighs.

Make sure that her arms are straight and hands are flat as she sweeps her arms out and around, covering the most area that she possibly can.

Demonstrate this simultaneous arm action out of the water first. See if your child can copy your movements.

Now demonstrate the front glide then one pull (no kicking) to show how far you can go.

Now it’s her turn. She might start the pull too soon, and when she pulls, her arms may come up above the surface briefly. She might also lift her chin during the pull. All of these actions will slow her down and prevent her from getting as far as she otherwise could.

With plenty of practice, she’ll be able to do it beautifully.

Swimming doesn’t have to be exhausting. It is a lesson in knowing that if you can get from point “A” to point “B” and not be winded, then you’re probably doing something right.

It takes very little energy to achieve a vast distance, and this is all accomplished without even kicking your legs. I can do this for the entire length of my pool which is eleven yards. I sound like I’m bragging, but I’m not because eleven yards is not that impressive. I would like to know what distance a competitive swimmer could cover. I’m sure it’s way more than I can do.Glide through water.

Back glide through water

To glide on the back, have your child hold onto the wall or gutter, place her feet on the wall, put her head back in the water (looking up at the sky or ceiling) then gently push off of the wall.

As soon as she lets go of the wall make sure she superglues her arms to her sides, sticks out her belly button and straightens her legs while her feet remain below the surface.

You can practice this backstroke position on land too.

It’s a good idea to use a nose clip when first learning this skill. Some children will push off of the wall too hard resulting in the face going under the water. I also tell my students to hold their breath for the same reason.

With practice, your child will figure out the correct force required to push off from the wall.

Some of my speed demon students have a hard time slowing down, so I tell them to go in slow motion like an astronaut moving through space. It works every time.

Your child needs to be able to perform this skill for ten seconds. Ten seconds of maintaining the perfect body position as previously described. This is essential before adding an arm action or even kicking for that matter. Progressing before she’s mastered the back glide will simply not work.

The back glide is the foundation from which to build. If the foundation is not solid, it will not hold-up if you add an arm action or kicking too soon.

Glide through the water. How to teach the back glide.

The duck, starfish, penguin stroke


What is the duck, starfish, penguin stroke? It’s a simultaneous arm action performed following a back glide.

To teach this, have your child stand up either on the pool deck or in very shallow water with her arms at her sides.

Tell her to drag her thumbs up against her sides to under her arms. As you demonstrate this, have her mirror your movements. It’s the duck position (duck wings, quack, quack).

Now have her form the letter “Y” with her arms. It’s the starfish position.

And finally, keeping her arms straight, instruct her to bring her arms back down to her sides, keeping in line with her body, more commonly known in my circles as the penguin position.

elementary back stroke arms action.

Repeat this sequence a few times, before having her try it from a back glide.

She might need a little assistance when first learning this. Support her head while she works out the movements.

She might lift her hands out of the water when transitioning from the duck to the starfish position. Encourage her to keep her hands submerged during the entire stroke.

The sweeping action that takes place from the starfish to the penguin position should be performed forcefully with straight arms.

The penguin position should be held for two or three seconds, before repeating the sequence.

This arm action is part of a formal swimming stroke called the elementary backstroke. The elementary backstroke is also known as a resting stroke since it takes minimal effort to cover tremendous distances.

Mastering this arm stroke is essential. It could potentially save your child’s life. Having the capability of propelling through the water with little to no effort and being able to breathe in the process is a life-saving skill and should always be the go-to stroke when fatigued, and breathing is necessary.

What’s next?

If your child no longer needs the nose clip, then it’s time to learn breath control. If this is not the case, it’s time to make it a thing of the past. Find out how to give up the nose clip, goggles, and/or ear protection. And if she has already mastered breath control, she’s ready to conquer the deep end.
10 best teaching tools for swimmers | Overcome fear of water
Back to top

Breath Control: How to Blow Bubbles for Beginner Swimmers

August 14, 2016 by Tessa Rhodes 2 Comments

how to teach your baby to swim 0-6 months

If your child can put her whole face in the water for at least 10 seconds, float on her front, float on her back, and has mastered various other rolls and floats, then she’s ready to learn basic breath control skills (blowing bubbles).

Breath control, blowing bubbles swimming.
Teach your child rhythmic breathing

Don’t worry if your child hasn’t given up the nose clip yet. She can start by blowing bubbles with her mouth.

Ultimately, however, blowing bubbles with her nose is the better choice since this option is more efficient at keeping the water out of the nose.

If a swimming pool is not an option, your child can practice this in a bathtub.

Blowing bubbles, breath control swimming.

Blowing bubbles through the mouth

Before putting her face in the water, have your child practice taking a deep breath in, then exhaling slowly through her mouth. Don’t let her hyperventilate.

To prepare to blow bubbles, have your child sit in a bathtub or on the steps of a swimming pool. Tell her to hold her breath, place her mouth in the water and blow bubbles at the surface.

Assuming that went well, have her do it again. This time with her whole face or head in the water.

Have fun Experimenting with blowing bubbles. Have an underwater birthday party with your child. Blow out the candles on the imaginary cake.

You can also have her start blowing bubbles for a second then stop, then begin again and so on. Or hold her breath for about ten seconds under water, then blow bubbles slowly until she needs to come up for air.

This new skill will enable her to keep her face in the water for longer. Many of my students can stay under the water for twenty to thirty seconds or more.

10 best teaching tools for swimmers | Overcome fear of water

Blowing bubbles through the nose

Blowing bubbles through the nose can be more challenging for children than blowing bubbles through the mouth.

Demonstrate this first out of the water. Take a deep breath in through your mouth then exhale through your nose. Exhale forcefully enough to allow your child to hear the air pass through your nose.

Now it’s her turn to try it. You can tell her that it’s like blowing her nose with a tissue (watch the video for more specific instructions). And just in case your little one doesn’t know how to blow her nose with a tissue yet, here’s a great tip.

Now have her hum after inhaling through her mouth. Humming will automatically blow air through the nose. Humming is the preferred approach. Easier for young swimmers to grasp than just exhaling through the nose.

Time to try this in the water. Tell her to take a deep breath in through her mouth and start humming. Continue to hum then place her mouth and nose in the water.

The chances are that the bubbles she produces will come from her mouth the first few times. Stress to her that she needs to close her mouth tight to make the bubbles come from her nose.

It will take more practice to blow bubbles through the nose, but in the end, it will be worth it. It is the best way to keep the water out of the nose, especially when rolling over in the water.

More specifically, if she starts to exhale or hum before her nose hits the water, continues to blow bubbles through her nose or hum while under the water and keeps exhaling or humming until after she has safely emerged from the water, this will guarantee a happy nose.

Bobbing


Bobbing is rhythmic breathing while bouncing up and down in the water. Rhythmic breathing is essential when learning formal swimming strokes. It’s best to learn this skill in chest-deep water.

Demonstrate this first. Take a breath in through your mouth then squat down to submerge your whole head. Exhale slowly through your mouth or nose then come right back up for more air. Repeat this sequence three or four more times rhythmically.

Now it’s your child’s turn. See if she can do it on her own first. Some kids will stay under the water too long or end up floating because they don’t plant their feet. Some children wipe their face each time they come up for air.

If she needs help, hold her on your hip and take her down and up. Instructing her each time to take a breath then blow bubbles. Or you can face each other and try it while holding hands.

After some practice, she’ll get the hang of it. With a lot more practice and as long as she has an even exchange of air coming in and going out, she should be able to do this for a minute or more.

At first, however, start with more attainable goals, such as three or five bobs in a row.

What’s next?

Propulsion. Teach your child to propel through the water if you haven’t already covered this. Otherwise, if there doesn’t appear to be any trace of fear in your child when she plays around in the shallow end of a swimming pool, she is ready to be introduced to the deep end.

10 best teaching tools for swimmers | Overcome fear of water

Having Fun Learning Various Rolls, Floats and More

August 14, 2016 by Tessa Rhodes Leave a Comment

Teach your child how to jump into a pool safely.
Time to play with their newly acquired skills

If your child can front float independently for at least five seconds and back float unaided for at least fifteen seconds consistently, then she’s ready to learn how to roll and experiment with other ways of floating.

how to teach your baby to swim 0-6 monthsNot there yet? Go to Help Your Child Learn How to Front Float or Back Float.

You will need access to a swimming pool and make sure your child has her goggles, a nose clip, and swimming headband or ear cap (swim cap) if necessary.

Going from horizontal to vertical

Make sure your child can stand up after floating.

From a front float, have her lift her head out of the water, forcing the arms down, bring her knees under her body then place her feet on the bottom and stand up.

From a back float, have her lift her head, tucking her chin to her chest, bring her feet up, which will drop her hips, circle her arms back, down then forward, place her feet on the bottom and stand up.

Discover how hard it is to sink

It’s a lot of fun to try to sit on the bottom of the pool. Challenge your child to try it. She might get obsessed with this. It’s happened with a few of my students. Don’t discourage her; it’s a great learning opportunity.

She’ll discover that even if she wants to sink, it’s next to impossible. Her body will just float right back up to the surface. If she’s not already convinced that the water floats her, this will make her a believer.

Now try to lay down on the bottom. I like to demonstrate this first. Some of my students like to sit on me and try to pin me down. It’s fun, even for me. I think it goes without saying to not sit on your child when she attempts this. Have a good time!

Diving for objects

Diving for objects is a favorite activity among my students. After learning how hard it is to sink, your child will find this to be an enjoyable challenge.

Start by dropping a few sinkable objects, such as rings, torpedoes or treasure in two to three feet of water. Go deeper for bigger kids. It’s best to start with rings as they’re easier to grasp.

Let your child try to figure out how to get down far enough to reach for the object. After a few attempts, you can give her a little push towards the bottom, if she needs help. Eventually, she’ll figure it out.

To teach her how to get to the bottom: she will start in a front float, then bend forcefully at the waist, which will drive her hips up and her torso down, which will put her in reaching distance of the object.

To explain this in a way for her to understand, you might say, “kick your feet down” or “stick your bottom up in the air or up to the sky” after she’s in her front float.

Another way to get down to the bottom is feet first. You just keep your chin up after you jump up and let your body sink to the bottom. It’s all about keeping the chin up. It’s challenging for young children because they can’t help but keep their eyes on the prize.

10 best teaching tools for swimmers | Overcome fear of water


Tuck float

Teach your child how to do the tuck float.
Tuck float

Have a ball becoming a ball. A tuck float is when you float while you hug your knees and tuck your chin to your chest, forming the shape of a ball.

I don’t know what it is about the tuck float, but my students love doing it repeatedly.

In chest-deep water, instruct your child to take a breath, put his face in the water and tuck his chin to his chest, bring his knees up to his chest and wrap his arms around his legs, just below his knees then allow his body to rise to the surface. Have him hold this position for at least five seconds.

Jellyfish float

Teach your child the jellyfish float.
Jellyfish float

Pretend to be a jellyfish. Imagine that your limbs and your head are the tentacles of a jellyfish.

Now, in chest-deep water have your child hold his breath, put his face in the water and let his arms, legs, and head hang, relaxing as much as possible. Try to be a jellyfish for at least five seconds.

Some younger children find this to be a challenge. Others have a hard time relaxing in this position. Their arms and legs are straight and stiff.

It doesn’t matter if his jellyfish float isn’t perfect. If he’s willing to try it, that’s all you can ask of him.

Discover more with the back float

If your child is completely comfortable and relaxed with the back float and can do it independently every time for at least fifteen seconds, then he’s ready to experiment with it.

It’s a good idea to use a nose clip for this activity since his face may go under the water without warning. You don’t want water entering your child’s nose when he is face up in a supine position. It is most unpleasant to the say the least.

Once he’s in a back float, have him play around with the position of his arms. Keeping his arms just below the surface, have him sweep his arms slowly around and up to above his head (arms remain under the water).

At the same time, have him tuck his feet under his body (arching his back). He’ll discover that his lower body will rise to the surface and his upper body will dip down a little bit.

Try to sink from a back float

Now, see if he can figure out how to sink from a back float.

If he brings his chin to his chest, if he kicks his feet up toward the surface and if he reaches with his arms out of the water and up toward the sky, he will sink.

When learning to swim, It’s essential for your child also to know how to sink. He will have a better understanding of the properties of water and as a result, a better relationship with it.

Roll over

Rolling over is an essential safety skill. When learning how to swim on your front, first you must learn how to swim with your face in the water. Being able to roll over on to your back to rest and catch your breath comes in very handy when you get tired from swimming.

When first learning how to roll, most children will have a difficult time keeping the water out of their nose. A nose clip comes highly recommended at this point, especially when rolling from their front to their back. Not the case when rolling from their back to their front.

Have your child perform a back float for a couple of seconds, then hold their breath, roll over and stand up.

Now try from a front float. Have your child hold their breath, execute a front float for at least a couple of seconds, roll to their back and float for a few seconds, then stand up.

Your child might need some help with this one. When attempting to roll over, they may wind up in a sitting position. To fix this, tell your child to “first look at the bottom of the pool, then look at the sky or ceiling, not the walls.” Also, remind them to stick out their belly button to complete the back float.

You can also have them try to roll continuously. Not only is this fun, but playing around with rolling, ultimately builds your child’s confidence as they discover new ways to move through the water.

Otter rolls


Another critical safety skill is the otter roll. It starts in a back float and ends in a front float. In this instance, however, you roll forward rather than sideways.

Have your child perform a back float for a few seconds, then hold his breath and tuck his chin to his chest and then continue to press his chin against his chest. If he maintains this position without using his arms or legs, he will end up in a front float.

If your child is pressing his chin against his chest and doesn’t appear to be rolling forward, it’s likely because he is holding his back straight. Encourage him to relax and round his back (like a tuck float).

After he gets the hang of it, have him do a back float at the wall. Once he starts floating and drifting away from the wall for a few seconds; have him perform an otter roll to get back to the wall.

Just one more way to swim to safety, in this case, the wall.

Jumping in

Teach your child how to jump into a pool safely.
Start with the toes over the edge

Start by having your child jump into chest or shoulder-deep water. Any more shallow is discouraged as it’s not safe.

To prepare for the jump, have her put her toes over the edge, give her a point of entry, which should be about a foot from the side.

Now have her jump in on your cue of “1,2,3”. To keep her from possibly hitting the wall on her way in, stand in the pool at her side and place your hand behind her back and be ready to give her a little shove if it appears that she’s about to hit the edge.

If she’s not comfortable with jumping, you can have her take a big step in or enter from a sitting or squatting position. Remind her that after she jumps in, that she can stand up and her head will be out of the water.

Also, make it a habit to have her always get back to the wall after jumping in. Even if all she’s doing at this point is standing up, turning around and stepping back to the wall, it’s ultimately teaching her to swim to safety.

What comes next?

Wean your child from the nose clip, goggles, and/or ear protection. If your child isn’t ready to give it all up yet, that’s okay. She can still learn how to propel through the water.
10 best teaching tools for swimmers | Overcome fear of water
Teach your child how to float, roll over in the water, jump into a pool and more.
Back to top
« Previous Page
Next Page »

Copyright © 2025 · Beautiful Pro Theme on Genesis Framework · WordPress · Log in